Enrollment terminal
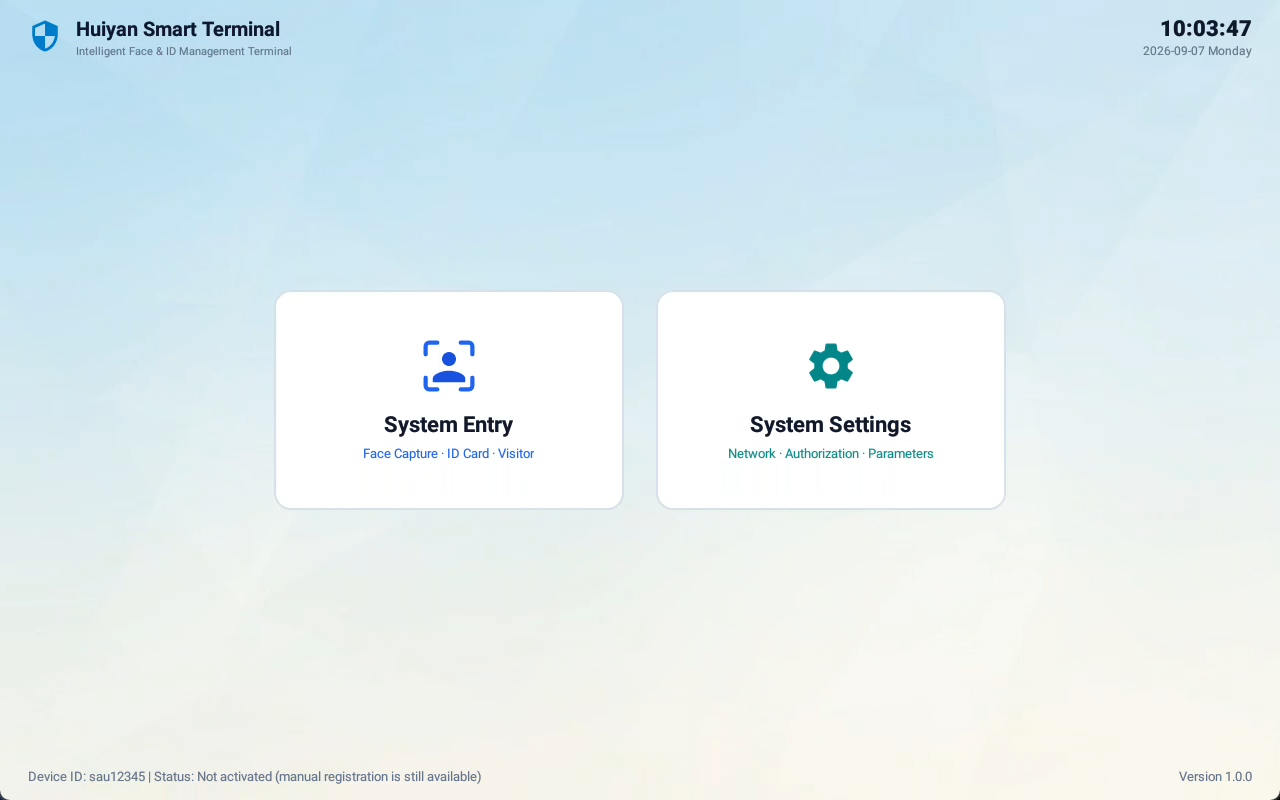
The enrollment terminal reads identity documents, captures face photos on site, and submits registration information to the central service. Staff use System Entry for capture and System Settings for connection and building configuration.
Before first use
| Item | What to check |
|---|---|
| Central service | A reachable address and a school-to-enrollment-device association configured during deployment |
| Reference data | The relevant building, floors, and agreed person-identifier rules exist |
| Camera | A working preview with the person's face fully inside the frame |
| ID reader | Connected, with the required USB permission granted |
| Terminal settings | Device user ID, building, and floor count match the site |
| Test information | Authorized test-person information is available for verification |
Configure the terminal
- Open System Settings from the main screen.
- Enter the central service IP address, port, and device user ID. This ID identifies the enrollment device to the central service; it is not a substitute for a Web login username.
- Set the building ID and floor count from the handover information. The page accepts 1–50 floors; room queries still depend on the enrollment device's building association in the central service.
- Complete activation through the project authorization process and select system language, Chinese, or English.
- Use the relevant save button. Return to enrollment, choose a floor, and check that the correct rooms are retrieved.
Check the result: Rooms belong to the intended building, the camera works, and a document can be read. A settings-saved message alone does not confirm the central connection.
Enroll one person
1. Open enrollment and confirm the person
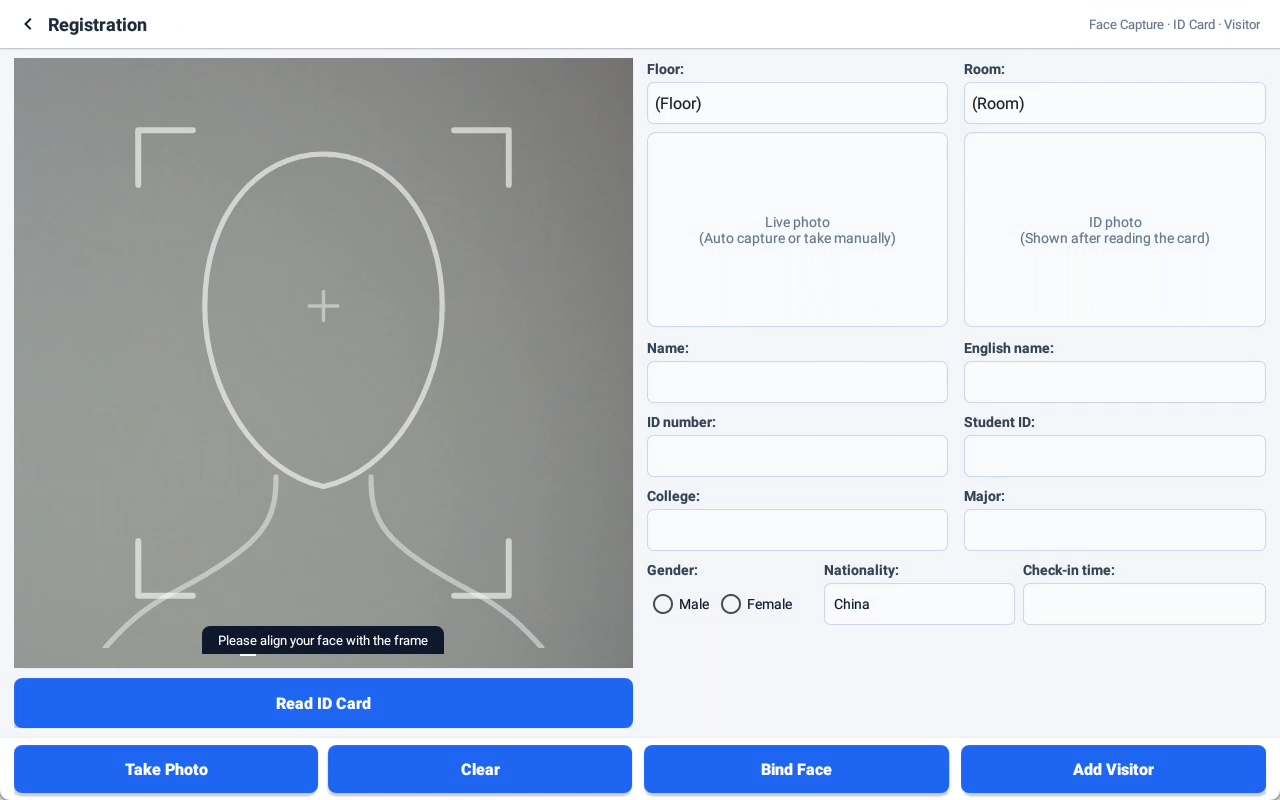
Select System Entry on the main screen. You can choose a floor and room to inspect existing residents when locating or updating a record. If a room has one person, the page can fill their basic details automatically; always check that these belong to the person being photographed.
Room selection assists lookup and review. The current school registration endpoint does not use this selection to assign the chosen room. Confirm the accommodation relationship in Service Platform → Apartment → Resident Management.
2. Read the document
Place the document flat on the reader. Wait for automatic reading or select Read ID Card. Verify the name, document number, and gender against the person. If reading fails, adjust the position and check the reader connection and USB permission before retrying.
The document photo and the on-site photo are displayed separately. A document photo does not replace the on-site face photo required for submission.
3. Capture a face photo
Ask the person to face the camera and adjust their distance and angle according to the frame guidance. The terminal can capture automatically once the position is stable; Take Photo is also available. Retake blurred, obscured, or incorrect photos before submitting.
| Guidance | Action |
|---|---|
| Align your face with the frame | Move the face into the capture area |
| Move closer / move farther away | Adjust the distance |
| Face the camera | Reduce sideways or tilted positioning |
| Position is suitable; keep still | Remain steady and wait for automatic capture |
4. Submit and verify
- Confirm that name, document number, gender, and the on-site photo are complete.
- Use Bind Face to submit the person and wait for the result. Avoid repeated actions while the request is in progress.
- Find the person in the central service and verify the name, photo, identifier, and room assignment.
- If the person will use a recognition device, follow enrollment and synchronization to verify the record on that device.
Check the result: The central service contains the correct person and photo, and the person can complete recognition after device synchronization. The terminal message, local record, and device synchronization result require separate checks.
About Add Visitor
The page includes an Add Visitor button, but the current school endpoint converts its submitted type to the regular person type. Do not use this button to establish visitor validity periods, appointments, approvals, or automatic departure rules.
5. Clear the current form
After checking the result, select Clear before enrolling the next person. This clears the current form and photos without deleting the person already saved in the central service. Confirm that no unsubmitted information is still needed before clearing.
Common issues
| Issue | Check first | Next action |
|---|---|---|
| Floors are available but rooms are empty | Device user ID, central building association, rooms on that floor | Correct the association and query again; changing only the local floor count is insufficient |
| No camera preview | Camera connection and app permission | Restore the preview and retake the photo |
| Document reading fails | Position, USB connection, and permission | Remove and replace the document; retain the exact error |
| Success message but no central record | School, identifier, and business response | Ask an administrator to inspect the response before repeating submission |
| Central record exists but recognition fails | Photo, device association, synchronization result | Continue through the synchronization checks |
The terminal message does not cover every business failure. Check the central record and business result instead of relying only on HTTP success or the terminal message. The daily screen exposes System Entry and System Settings; local records do not replace a central data backup.